Enter a payment (Accounts Payable)
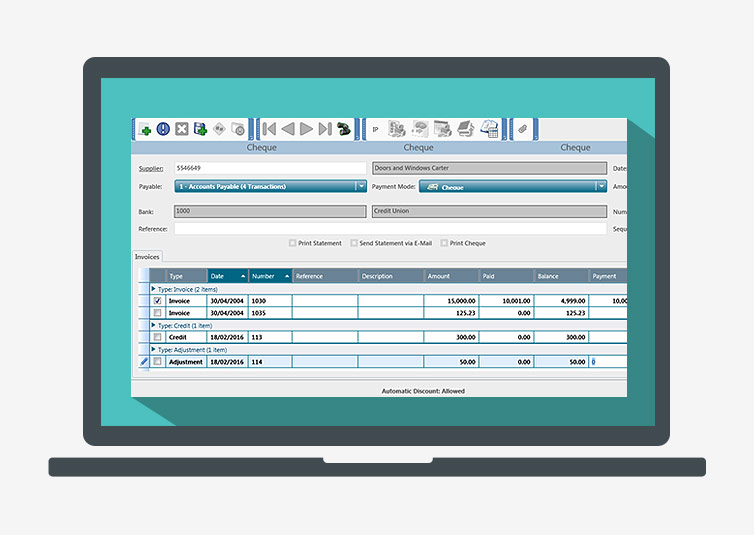
The Payment window is used to enter payments made to suppliers.
To enter a payment, proceed as follows:
- In the Accounts Payable tab, Transactions group, click Payment. The Selecting a Supplier window is displayed.
- In the list, double-click the appropriate supplier. The Payment window is displayed.
In the upper part of the window, the fields display the information associated with the suppler file and payable. In the Date field, the current date is proposed by default. - In the Invoices group, select the transactions to pay. The amount of each transaction is displayed in the Payment column and the discount amount is displayed in the Discount column. If the total amount is negative (e.g. credit), the payment becomes a receipt. The fields at the bottom of the window display information on the terms of payment and transactions associated with the payable.
- If required, select the following options: Print Statement, Send Statement via E-Mail and Print Cheque.
- Click
to save. The payment is added to the list of payments. The list of suppliers is displayed in order to enter another payment if required.
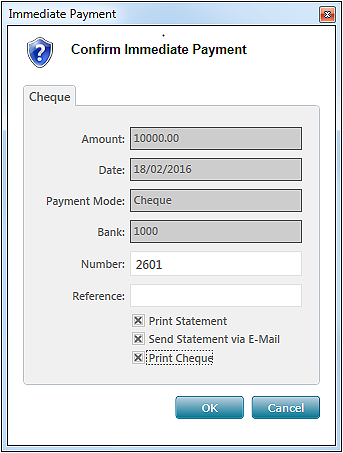
If the payment mode selected is Cheque or Direct Deposit, the Immediate Payment window is displayed.
In the Number field, the cheque number is proposed in order to respect a series of cheque numbers for the bank account. This field is displayed if the previously selected payment mode is Cheque. - If required, select the following options: Print Statement, Send Statement via E-Mail and Print Cheque.
- Click OK. Based on the options selected, the cheque can be printed and the statement sent by email.
The payment is added to the list of payments.
Help topics
in the software
You can access Acomba X help topics using the 

 to save. The payment is added to the list of payments. The list of suppliers is displayed in order to enter another payment if required.